AI application development basic setup in Visual Studio Code
I'm documenting a personal workflow for setting up the development of AI (Agent) applications.
1. Create a Structure
1 | 📦advanced-rag-app |
Suppose this is a Python project for an advanced RAG application. Below is an explanation of the purpose of each components.
📂graph: This directory represents the core components of your RAG application's data flow or computational graph.
- 📂chains: Contains logic for chains, which might
define the sequences or workflows in your RAG pipeline.
- tests/: Contains unit tests to validate the behavior of the chains.
test_chains.py: Test file for the chain-related logic.
__init__.py: Makes thechainsdirectory a Python module.
- tests/: Contains unit tests to validate the behavior of the chains.
- 📂nodes: Represents individual components or steps
in the graph. Nodes could be processing units, like transformers or
embeddings, used within the graph.
__init__.py: Initializes thenodesmodule.
consts.py: A place for defining constants (e.g., default values, thresholds, or configuration keys) used across thegraphmodule.graph.py: Contains the main implementation of the graph structure, potentially orchestrating the flow of nodes and chains.state.py: Likely manages the state of the application or graph, such as caching intermediate results or tracking the flow through the graph.__init__.py: Initializes thegraphmodule, potentially exposing key functions or classes to be used by other parts of the application.
📜Pipfile & 📜Pipfile.lock
Pipfile: Defines the project's Python dependencies and configurations, including development and production requirements.Pipfile.lock: A generated file that locks the exact versions of the dependencies to ensure reproducibility.
2. Create a Virtual Environment
Pipenv is a powerful dependency management tool for Python that
combines the functionality of pip and
virtualenv into a single workflow. Designed to streamline
Python development, Pipenv makes it easier to manage project-specific
packages, virtual environments, and dependency conflicts.
1 | pip3 install pipenv |
1 | # Pipenv might be installed, but your shell might not know where to find it. |
1 | cd advanced-rag-app/ |
Install commonly used packages.
1 | pipenv install langchain |
LangChain: LangChain is a framework for building applications powered by LLMs. It provides tools for creating chains, agents, and retrieval strategies that form the cognitive architecture of applications. It supports tasks like decision-making, RAG, and more.
- Chains: Pre-defined workflows combining multiple components.
- Agents: Decision-making entities that select tools based on user input.
- Memory: Maintains state across interactions for context-aware behavior.
- Integration with external tools via modular packages.
langchain-core: This package contains the foundational abstractions and interfaces for LangChain. It defines the base components like LLMs, vector stores, retrievers, and tools.
Lightweight dependencies with no third-party integrations.
Provides the "Runnable" interface for consistent invocation of components (e.g.,
stream,invoke,batch).Relationship: Forms the backbone of LangChain by offering core functionality upon which other packages (e.g.,
langchain,langchain-community) build.
langchain-community: A community-maintained package containing third-party integrations for LangChain. It includes connectors for external LLMs, vector databases, and other tools.
Optional dependencies to keep it lightweight.
Encourages community contributions to expand LangChain's ecosystem.
Relationship: Extends the functionality of LangChain by enabling integrations beyond the core package.
langchain-openai: A specific integration package for OpenAI models within LangChain.
Provides seamless interaction with OpenAI's GPT models.
Includes utilities to handle inputs/outputs specific to OpenAI's API.
Relationship: A standalone integration package that depends on
langchain-corebut focuses exclusively on OpenAI's offerings.
langchain-chroma: An integration between LangChain and Chroma, enabling seamless use of Chroma’s vector database capabilities within LangChain applications.
Simplifies local prototyping by eliminating the need for external servers and supports features like in-memory or persistent storage modes.
Supports operations such as adding, querying, and updating embeddings, making it developer-friendly for tasks like similarity search and document retrieval.
Relationship: Chroma complements LangChain by providing a lightweight, efficient vector store that integrates seamlessly. Together, they enable developers to prototype locally and scale AI applications effectively.
LangGraph: An extension of LangChain designed for building multi-agent systems and stateful workflows using graph-based coordination.
Models workflows as nodes and edges in a graph structure.
Supports cyclical graphs and advanced agent coordination.
Exposes interfaces for creating custom flows or common agent types.
Relationship: Depends on
langchain-corewhile adding graph-based capabilities. Complements LangChain by enabling complex multi-step workflows.
LangChainHub: A repository or platform for sharing reusable LangChain components such as chains, prompts, and templates.
Centralized location for community-contributed resources.
Facilitates rapid prototyping by providing ready-to-use modules.
Relationship: Acts as an auxiliary resource to the LangChain framework, promoting collaboration and reuse among developers.
Relationships Summary
| Component | Dependency/Relation | Purpose |
|---|---|---|
langchain-core |
Foundation of all other packages | Defines core abstractions and interfaces. |
langchain |
Built on langchain-core |
Implements cognitive architecture (chains, agents). |
langchain-community |
Extends langchain with third-party integrations |
Adds optional connectors for external tools. |
langchain-openai |
Built on langchain-core |
Focuses exclusively on OpenAI model integration. |
langchain-chrome |
Extends langchain-core |
Adds Chrome-based automation capabilities. |
LangGraph |
Extends langchain-core |
Enables graph-based multi-agent workflows. |
LangChainHub |
Independent but complementary | Repository of reusable LangChain components. |
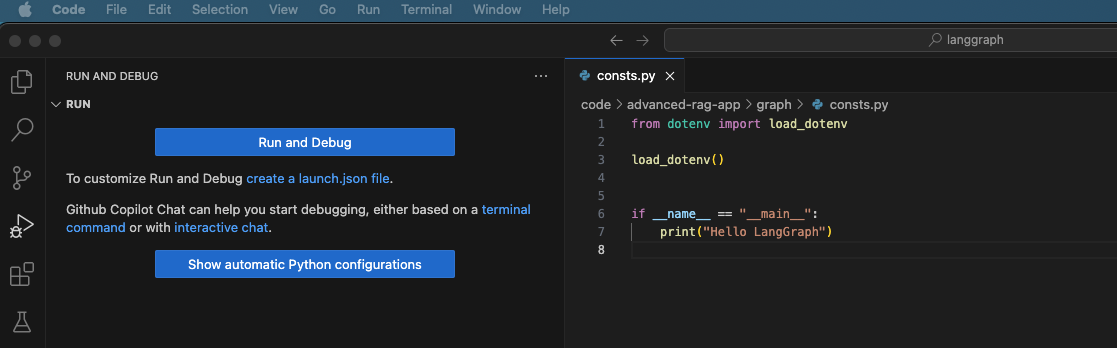
3. Setup Debugger
Create a launch.json file by clicking on 'create a
launch.json file' -> 'Python Debugger' -> Python File (Debug the
currently active python file).
Add one line to 'configurations'. This specifies a file that contains
environment variable definitions. These variables will be loaded into
the environment when debugging the application. Typically, this is a
.env file.
1 | "envFile": "${workspaceFolder}/.env" |
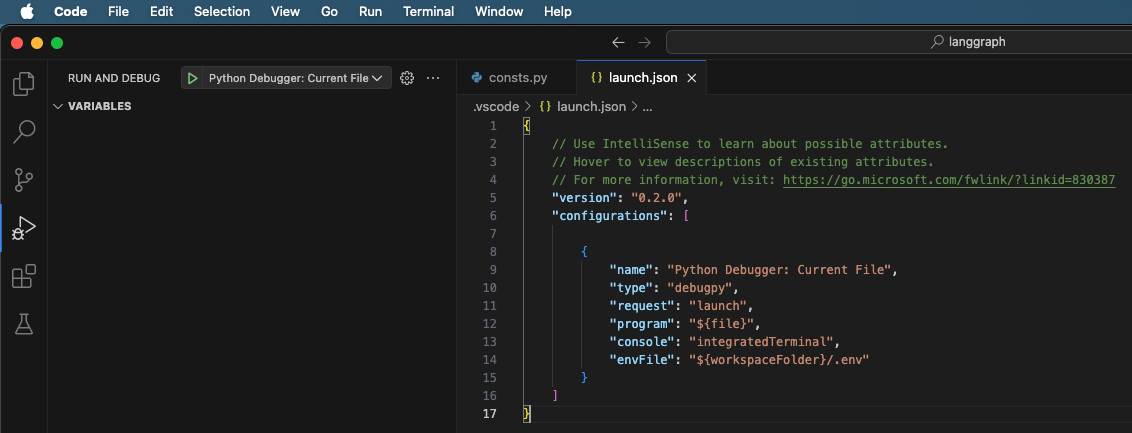
You can find launch.json in the directory
/advanced-rag-app/.vscode/launch.json.
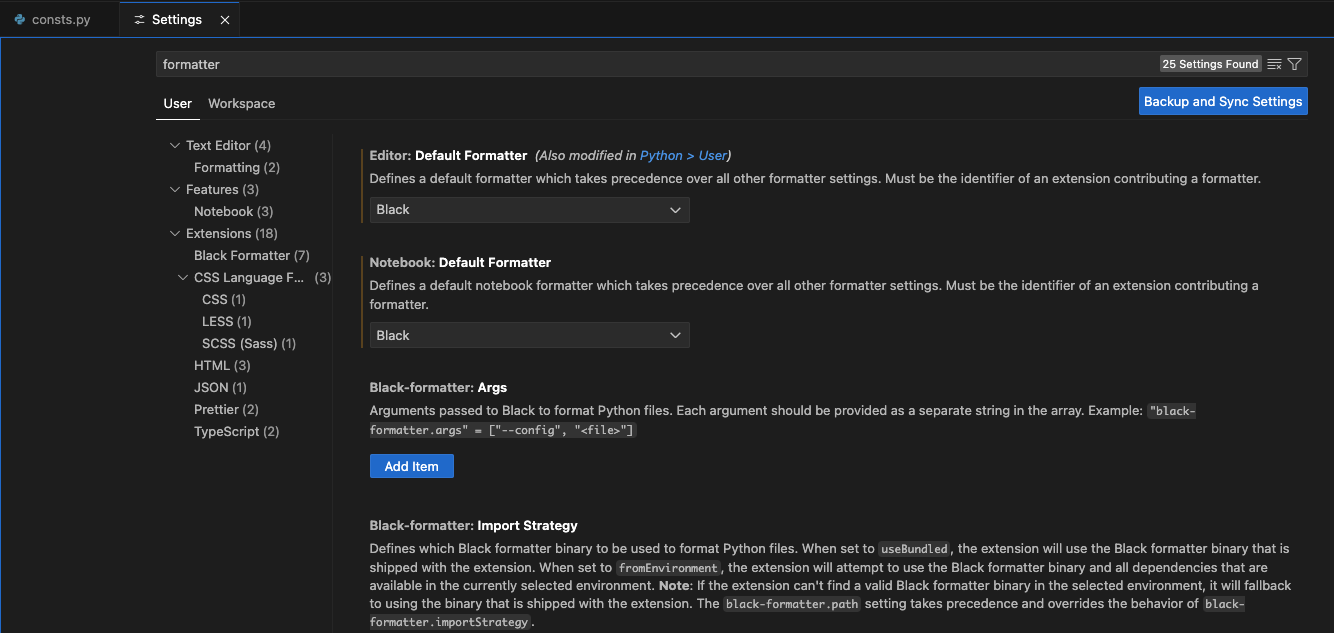
4. Setup Black Formatter
Open your VSCode settings by Command+Shift+P, go
'Preferences: Open User Settings'.
Search for "formatter" and select "black" as default formatter for editor.
Search for "format on save" and enable the "Editor: Format on Save" option.
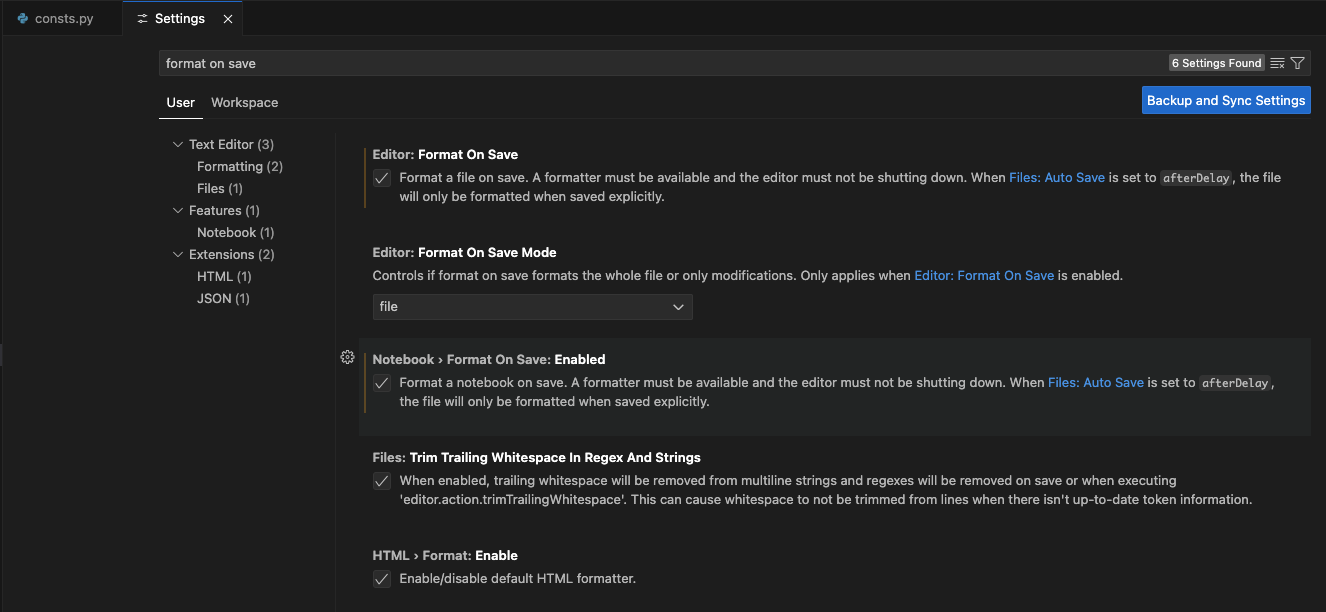
For more information, please find Formatting Python in VS Code.
5. Configure Automatic Testing
1 | pytest . -s -v |
This is a way to run tests using the pytest testing framework in Python.
pytest: Invokes thepytestframework to discover and run tests..: Specifies the current directory as the location to look for test files.pytestwill automatically search for files matching the naming conventions liketest_*.pyor*_test.pyin the specified directory.-s: Instructs pytest to not capture standard output (stdout) during the test run.Without
-s, pytest captures all output (e.g.,printstatements) and shows it only when a test fails.With
-s, you can seeprintstatements or other output in real time while the tests are running.-v: Stands for verbose mode.Provides more detailed output for each test case, including the test name, status (pass/fail), and sometimes additional context like line numbers. This is useful for debugging or understanding the progress of the test suite.
Go to 'Testing' -> 'Configure Python Tests' -> 'pytest (pytest
framework)', and select the correct directory. You will find
configurations created in .vscode/settings.json.
For more information, please find Python Testing in Visual Studio Code.